Showing posts with label Making Your Own Groceries. Show all posts

Thursday, June 10, 2010

Frugal Cleaning Tips

jhuytjgt Pictures, Images and Photos

After this post I am hoping that you will be inspired to toss out all your toxic, expensive cleaners and replace them with all natural, frugal versions. I know that I am one who hates to clean with stinky cleaners that make me feel like I should be wearing a gas mask to use them or burn my skin and eyes. I especially hate to use things with bleach. The smell alone is enough to make me gag. You should have seen me when I was pregnant.

Here are the items that I feel should be in everyone's cleaning bucket...

Baking soda
Vinegar
Olive Oil
Spray bottle
Old rags
Stainless Steel Scrubber

What can you do with the above items?

Toilet cleaner - Vinegar works well for this along with a stainless steel scrubber and toilet brush.

Stopped up drain- Check out Laura's post here on how to clean out a clogged drain with vinegar, baking soda, an old rag, and boiling water. I used to do something like this. It really does work.

Mirrors - Vinegar in a spray bottle. It smells odd at first, but the smell goes away once it dries.

Soap scum - I use some baking soda with a scrubbing sponge or old rag. It works really well.

Stainless steal cleaner - The same as soap scum. I have been able to get really old stains off of my stainless steel sink this way.

Counter tops - You can use a combination of vinegar (or lemon juice) and baking soda to clean between grout on tile counters (and floors). You can run some vinegar on counter tops to cut through grime.

Fabric softener - Vinegar wins again. Put some in the rinse cycle. I use a fabric softener ball that opens in the rinse cycle so I don't have to remember to add it. I promise your cloths will not smell like vinegar at all.

Deodorizer - Baking soda is a wonderful frugal deodorizer for many areas of your home, not just the fridge. Don't forget about homemade deodorant.

Carpet Spills - Pour baking soda on spills and allow it to soak up the liquid. You then vacuum up the mess. This is also a great way to get smells out of carpet. I once used it to get the smell of vomit out of my carpet. I let it sit most of the day and then vacuumed, no more smell.

Laundry Detergent Booster - Add baking soda to your laundry to help remove stains.

Furniture Cleaner - I usually dust with a clean, damp rag. You can then go over your wood furniture with a small amount of olive oil. Make sure to test it in a small area first to make sure it will not stain.

Clean Produce - Sprinkle baking soda onto your produce and use a clean rag to help scrub off chemicals and finger prints.

And so much more! To check out all the ways you can use baking soda check out the Arm and Hammer Site here.

You can always buy generic, but to make Arm and Hammer cheaper you can get coupons here.

Thursday, May 27, 2010

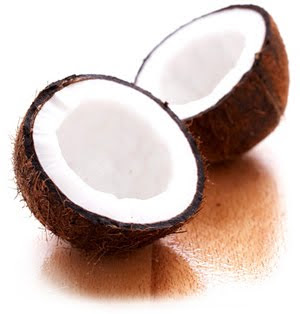
The Many Uses Of Coconut Oil


Since I wrote a post yesterday on homemade deodorant and I was wanting to write one on homemade sunscreen (coconut oil) I figured I might as well tell you about all the uses I know of so far for this versatile oil. Not only is it very healthy for you to use in recipes, but it also has many cosmetic uses.


Here is a list of what I have researched so far...

Deodorant-See my post on this here.

Hair gel- Just use it straight out of the jar. I have been told this works really well on curly hair. Someone will have to tell me if this really works since I have very straight hair.

Hair conditioner- Again use it straight out of the jar.

Acne cream- I had a reader suggest this one to me. I have to admit that even at nearly 30 I still have issues with pimples. I was told that this will help dry them out quickly. I was a bit skeptical since it is an oil. How could an oil dry something out? Well I tried and guess what? It really does work.

Sunscreen- Islanders have been using coconut oil for years as a natural sunscreen. This is one I plan to try this summer. I have a lot of issues with applying chemicals to my babies to protect them from sunburns. Even the organic and natural brands still make nervous. Hopefully this works.

Toothpaste- You can check out Lindsey's recipe for this here. I have not been brave enough to try it yet. I still have a couple tubes of Nature's Gate toothpaste that I bought using Swagbucks. Maybe I will have to try this one sometime.

Lotion- You can add shea butter to coconut oil to make a great lotion or just use it by itself. I have been using coconut oil on my 2 year to treat eczema. For a long time it was the only thing that did not make him scream.

Facial moisturizer- Apply just as you would any moisturizer.

Diaper rash cream- I found the original recipe for this at Passionate Homemaking. You can check out my post on it here.

Don't forget all the great ways this oil can be used in cooking. You can use it to replace butter when baking, in popcorn, as a spread on bread, and in oatmeal. While researching for this post I ran across this article on the benefits of coconut oil. It was quite interesting.

I know that there are tons of blogs right now that can show you how to buy all of the above listed products for cheap or even free, but at what cost to your body? I will admit that I have used coupons to get things for free, but after reading the ingredient list I decided to try and look for alternatives. The only problem was that organic and natural products are very expensive. I still buy them when I can find them on sale or I have coupons for the natural brands, but when I am unable to afford them coconut oil is a great alternative. It is cheap and good for you.

So where is the best place to find coconut oil? I have used spectrum brand in the past, but have lately been using Nutiva. Right now you can get 2 jars on Amazon for around $13. This is a great price.

It might be cheaper to buy it in bulk from Azure Standard or Mountain Rose Herb if you can find someone willing to split it with you.

I would caution you not to buy the cheap stuff you can buy at Walmart or other grocery stores. It is not the same and it contains additives.

Isn't it amazing how our Lord provides us with one product that can be used in so many ways and only cost us pennies per use?

Homemade Deodorant Update


Awhile back I wrote a post on making homemade deodorant. I thought it was time to do a little update on what I think of it. Hopefully you are not completely grossed out, but you might as well hear my whole review.

It has started to get hot here in Kansas and I have noticed that since having my third baby I am much stinkier then I used to be. In fact, I never really used deodorant. Gross I know, but I really think that after awhile the bodies pH adapts and not everyone needs it all the time.

Well I think my body is changing again and I need it. I seem to stink the most about an hour after I shower. Earlier this week I noticed the smell and decided to rewash my underarms (still stiny) and try some of the homemade deodorant that I had made for my husband. I could not believe it. The smell was gone almost as soon as I put it on! What was even better is it did not come back.

So I would have to say that this recipe is a winner. I originally found it on Passionate Homemaking and have been passing it around to friends ever since.


5-6 Tablespoons coconut oil
1/4 cup arrowroot flour (or cornstarch)
1/4 cup baking soda

Mix everything together in a bowl. You may have to warm the oil a bit to get everything to mix. It will become solid again as it cools. You can then either leave the mixture in a bowl and apply with your fingers or place it in an empty deodorant container and apply that way.

Monday, May 24, 2010

Fun Birthday Food Without Artificial Colors


I guess from the comments I received from my last post I will continue with this blog. I am aiming to update once or twice a week as suggested by a commentor. We will have to see where things go from there. I also was talking with one of the moms from my daughter's preschool and she was commenting on how expensive it is to eat healthy. She loved the idea of this blog and urged me to continue. I am planning to take it slow and not stress if I am not keeping up with my planned schedule.

All that said I ran across a really great idea from Martha Stewart for cupcake icing and ice cream syrup that is made with fruit and herbs. My daughters birthday is in a couple of weeks and I was cringing at the idea of making her a cake full of artificial colors. I now have green, purple, and pink colors ready to test out tonight to see what we think. I wish I had taken pictures of the process, but I did not decide to post about it until after I had it all made. I will try to get some pictures of the finished product and post them later.

Basically what I did was cook up some blueberries, strawberries, and some chocolate mint leaves and add them to a simple sugar solution. They are all really yummy. After straining them through a towel I now have 3 colors to make icing or pink, purple, or green "cows." (brown cow ice cream)

I would love to post the actual recipe, but since it is copyrighted I will just have to send you to the link to check it out for yourselves.

I could not locate the link to the icing, but basically all you do is add powdered sugar to the syrup until it is the consistency of honey. Dip the cupcake in it and you are done.

I am still searching for a good cake recipe. If anyone has one let me know.

Friday, December 18, 2009

Cute Homemade Gift Ideas

I have not had a lot of time to post the last several days, but I thought I would leave you with a link to some really cute last minute gift ideas. I love the fact that these are useful and can be made with healthy ingredients.

You can go to the Domino sugar website for some recipes for...

Sugar scrubs
Edible ornaments
Gifts in a jar
Food gifts

A lot of these come with printable gift tags.

Thanks Heavenly Homemaker for pointing out this site.

Tuesday, December 15, 2009

Baby Steps To A Healthier Lifestyle: Homemade Body Care

After posting the deal on coconut oil last week I had several requests for body care recipes using this oil. So today in our baby step to healthier living series I am going to concentrate on healthy body care items with recipes for deodorant and diaper rash cream. I found both of these recipes from Lindsay's site Passionate Homemaking. She LOVES coconut oil and uses it for just about everything. I have found a couple of her recipes that I really do think work.

Up first is homemade deodorant. It takes 3 ingredients and seems to work really well. My husband is a man who uses deodorant several times a day and I can not stand the smell of the canned stuff when he gets into bed at night. I asked him to try my homemade stuff. At first he was a little unsure, but after having used it for several months now he really likes it. It does not have a scent and it keeps him from being stinky as well. The other perk is that it lasts a really long time.

Here is the recipe...
5-6 Tablespoons coconut oil
1/4 cup arrowroot flour (or cornstarch)
1/4 cup baking sodaMix everything together in a bowl. You may have to warm the oil a bit to get everything to mix. It will become solid again as it cools. You can then either leave the mixture in a bowl and apply with your fingers or place it in an empty deodorant container and apply that way.

As you can see my husband left his in the bowl and has dug out an interesting pattern. You can use your fingers to warm it up a bit and then apply.

The next recipe I would like to share is for natural diaper rash cream. I have not had a chance to try this one out, but I am planning to soon. I did not have any shea butter or I would have taken some pictures for you. If you are interested in pictures you can check them out here.

Diaper Rash Cream

1/8 cup coconut oil
1/4 cup raw shea butter
1/4 cup arrowroot or cornstarch (not talc)

Combine all ingredients until you get the desired consistency and apply as normal.

We have used just coconut on my son's diaper rash before with good luck. I am sure this recipe would be even better. Coconut oil is a natural anti fungal which is nice when it comes to diaper rash.

If you would prefer to order your coconut oil and shea butter you can find it at Mountain Rose Herb.

Let me know if anyone tries these recipes and what you think. From what I hear coconut oil is also a great moisturizer for the hands and face as well. Isn't it amazing how the Lord provides us with such a great multipurpose oil? Who needs to buy lots of different products?

Thursday, June 11, 2009

Making Butter

Ok I have to start out by apologizing for not getting pictures of my butter making adventure for you. I know it helps to see the steps as they are described. This is the first in my series of making your own groceries. The cost of a gallon of raw milk for me is $2.50. I used 2 gallons to make about 8 oz of butter. So for $5 I will have milk, butter, cheese, and whey. Not to bad, plus it is much healthier.

Here is what I am planning for future posts...

Bread
Yogurt
Tortillas
Mozzarella cheese (I will be making this for the first time)
Pita
More as they come to me. I have lots of ideas.

My husband and I are striving to either make, grow, or raise as many of our own groceries as possible to save money, and also this will help us know exactly where our food is coming from. I think it is kind of a fun adventure to learn so many things that women used to do everyday without even thinking it was anything abnormal. I want my children to know how we get food and not to just think it comes from a grocery store.

One thing I find interesting is that from 2 gallons of raw milk you can make butter, ricotta cheese, and mozzarella cheese.

I forgot to mention that I finally found a source of raw milk about 30 minutes from my house for $2.50 a gallon! That is a steal compared to the $6 a gallon I have been paying for organic milk.

Here are the steps for making butter...

1.)Skim the cream off of the top of raw milk. You can buy cream if you want, but it will defeat the purpose of saving money.

2.)Fill a food processor 1/3 full of cream. I filled mine to the max liquid line.

3.) Set the food processor on high and let it run for about 10 minutes.

4.) At this point you should have the fat separated from the milk. You should see chunks of butter in the milk. Scoop all of the butter out into a clean bowl.

5.) Run COLD water into the bowl and squeeze out all the excess milk with a spoon. Repeat this step until the water is clear.

6.) Squeeze out all the excess water and you should have a nice ball of butter.

For a much better tutorial on this with pictures go to Heavenly Homemaker.

I promise for the next post I will remember pictures.