Showing posts with label Recipes. Show all posts

Tuesday, February 9, 2016

Under Eye Wrinkle Oil


Here is another post from my other blog, Our Quarter-Acre Homestead.

Last fall I turned 35. Up until now I never really bothered with preventing wrinkles or really even gave them much thought until a few weeks ago. It seemed like every morning when I would wake up the wrinkles under my eyes were becoming more noticeable. 

I am not ready to for this. To top it all off the other day I found a grey hair...at least I think it was grey. I am a dark blonde, but I do have some lighter strands. I am going to just go ahead and say that the so called grey hair I found was just a super blonde one. Yep that is what we are going with. 

I decided that I probably should start doing something about the wrinkles I have under my eyes and started researching what essential oils I could use to help combat time. 

After some searching the most potent ones I found were...

Carrot seed oil
Frankincense
Geranium
Lavender
Myrrh 
Neroli
Pachouli 
Rose
Tea Tree
Ylang Ylang

There are many sources that say lemon essential oil is great for aging skin, but I have decided not to add it to my list due to it's photosensitive nature.  When citrus oil is used on the skin it can cause sensitivity to the sun. I have even heard of children breaking out in blisters after handling lemons and then playing outside. This is not something I want on my face as a woman who loves to be outside.  

I decided that I would have to do my best and make something with what I had on hand. I am planning to make several other anti-aging skin treatments as soon as I get around to ordering the needed supplies. I will post those recipes as soon as I get them done. 


Under Eye Wrinkle Oil

1 ounce carrier oil such as jojoba or sweet almond

I am planning to add some rosehip seed oil eventually. 

Place all ingredients in a 1 ounce glass vial with a dropper. 
Apply several drops of the finished oil to under eye wrinkles morning and evening. 

I will post an update after I have used this for several weeks to let you know if I see a difference. 


This post contains affiliate links

Saturday, February 6, 2016

Cold and Flu Fighting Honey Lemon Ginger Tea


Last week my daughter was fighting a nasty cold with a fever and congestion. I made her this tea and forced it down her. Within 24-48 hours she was feeling much better. She said the tea was a bit spicy for her due to the ginger, but I made her at least drink a little bit of it. 

I also gave her several doses of Cold CalmI can not say enough good things about Cold Calm. I LOVE it. Whenever someone in my home needs to kick a cold fast this is my go to. 

I decided to drink several cups of tea myself to prevent catching her cold. So far so good. 

Ginger and honey are both wonderful antivirals that will help support the body when it is trying to fight off a cold or the flu. Not to mention ginger is an anti-inflammatory which helps with swollen nasal passages and congestion.  

This is a super simple recipe. If you can boil water you can make this. 

Cold and Flu Ginger Tea 

1/4-1/2 inch fresh ginger shredded or chopped
1/2 fresh lemon juiced
1-2 teaspoons honey or to taste

Fill a small coffee cup with water to measure then pour the water into a small pan. Place the shredded ginger in the water and simmer about 5 minutes. 

Strain the water back into the coffee cup and add lemon juice and honey. 

Please make sure you do not give this tea to children younger then 1 year old due to the honey on it. I am not a doctor and can not claim any health benefits. I am just a mom sharing what has worked for us.


This post contains affiliate links

Friday, November 13, 2015

DIY Whipped Chamomile & Lavender Lotion


I was playing around with recipes for a handmade swap I am participating in this month. I made this lotion thinking I would use it for the swap, but the recipe ended up not making enough for the five gifts I needed. Plus I was out of the ingredients needed for it so I decided to keep it for myself. I LOVE how it turned out. This lotion is so soothing and made my skin feel soft and smooth.

Unfortunately since this was an experimental recipe I did not get pictures of the process to do a proper tutorial, but I thought I would at least share the recipe anyway.

To make this recipe you will have to start a few days before you need it. Start by filling a jar about 1/4-1/2 full with dried chamomile flowers. Then fill the jar with you choice of oil. I used olive oil since that is what I had on hand, but any kind of liquid oil will work.

Next you can choose to let the oil sit for several weeks to infuse the chamomile into it or you can speed up the process by placing the jar into a pot of boiling water to make a double boiler. Let the oil heat for up to 2 hours. Then let the oil sit until it is cool. It is ready to use now, but the longer you let it sit the better.

To make the lotion you will need...

1/2 cup chamomile infused oil
1/4 cup coconut oil
1/4 cup beeswax
10 drops lavender essential oil

In a jar place the chamomile oil, coconut oil and beeswax and then place the jar in a pot of boiling water. Let all the oils and wax melt together until it is liquid.

Take the jar out of the water and let it cool slightly. At this point you can add the lavender essential oil.

Once the lotion has cooled completely you can use it as is or you can whip it with a mixer. I chose to whip it for a couple of minutes to give it a light texture.

This lotion is great for soothing irritated, dry skin and is safe to use on children.


This post contains affiliate links

Thursday, November 5, 2015

Homemade Vanilla, Mint, and Cinnamon Extract


I started making my own vanilla years ago and have never looked back. It is so much cheaper then the store bought kind as well as better quality.

This summer at our new house we had an abundance of mint growing so I decided to venture out and try making mint extract as well.

Then I figured as long as I was at it I might as well try cinnamon extract since I already had all the ingredients.

Making extract is seriously so easy. Anyone can make these.


The processes is the same for all three


Vanilla Extract:

You will need 7 vanilla beans and one cup of vodka. The cheaper the better. There is not need to spend extra money on quality vodka. I always feel strange when I go into the liquor store to buy vodka since I don't drink it and I usually buy 2 of the large bottles of the cheap stuff. I wonder what they must think of me. Especially when I get back into my minivan.

I usually cut open each bean and scrape out the insides. I add all the beans and the insides to an 8 oz mason jar (sometimes I double it.)

Next add the vodka and place a lid on it.

Give the jar a good shake and then put it in a cabinet and let it sit for 3-6 months. Give it a good shake every now and then.


Cinnamon Extract:

For the cinnamon extract I took 3 cinnamon sticks and added 1 cup of vodka.

Place a lid on it and store for 3-6 months.

Mint Extract:

Fill a mason jar about half way with fresh mint leaves. If you don't have any in your garden you can buy them in the produce department of the grocery store.

Finish filling the jar with vodka and let sit for 3-6 months.

There you have it. Three super easy ways to save yourself money in the kitchen.


This post contains affiliate links

Monday, October 12, 2015

Some Of My Favorite Pumpkin Recipes


Pumpkins Pictures, Images and Photos
Originally published on October 14, 2010

If you are anything like me you LOVE anything and all things pumpkin. I thought I would pass along some of my favorite pumpkin recipes. Pumpkin is such a healthy ingredient to add to recipes. It is packed full of vitamins. Not to mention that it is just plain yummy.
Feel free to add your own recipe links in the comments below. I am sure there are lots of fun recipes. I would love to try them.
Here is a list of my favorites...

Pumpkin Chili

Pumpkin Cream Cheese Dip

Pumpkin Hummus

Pumpkin Pie Oatmeal (I tried this the on Monday. When I woke my daughter up for school the first thing out of her mouth was "What smells so good?" This is a keeper)

Pumpkin Pie (The healthy version)

Pumpkin Yogurt
-This is basically just adding some pumpkin to vanilla yogurt with a dash of cinnamon


This post may contain affiliate links

Monday, January 26, 2015

My Favorite Gluten Free Flour Blend

We had to take my 7 year old off of gluten about a year and a half ago. I have been slowly learning to cook with various gluten free flours, but have had a lot of hit and miss recipes. My little guy is so sweet and usually eats whatever I make for him, but one of my children hates most gluten free breads. I kept trying new flour blends and I think I finally have a winner!! I have been using this blend for about a month now and last night I made pancakes with it. My child who does not like gluten free bread actually loved them. I guess I finally have something that works.

I am also excited about this recipe because most pre-mixed gluten free flours are SO expensive! This one is a lot cheaper.

I basically took a recipe I found on the web and tweaked it to use what flours I had on hand.

Basic Gluten Free Flour

1 cup White Rice Flour
1 cup brown rice flour
1 cup sweet sorghum flour
1 cup potato starch (must be starch)
1 Tablespoon xanthum gum

Mix everything together and use 1 for 1 in replacement of regular flour in your recipes. I have had success with muffins and pancakes so far. I am planning to try baking a loaf of bread soon. I will let you know how it turns out.

If you want to get all your ingredients online Amazon is a great place to start or you can try to find them cheaper in bulk at a natural food store. Another great option is Azure Standard.

Thursday, September 15, 2011

Black Bean Quesadillas

I am always on the look out for great vegetarian recipes to help keep the budget down. My mother-in-law gave me this recipe and I have to say that my husband loved it. It was so easy to make and you should have all the ingredients you need already in your pantry.

All you should need to add to these is a small salad or some veggies to finish it off.


Black Bean Quesadillas


1 can black beans, drained
1 Tablespoon sour cream
1 Tablespoon salsa
1 clove garlic
1/2 Tablespoon red onion
1/2 teaspoon salt
1/4 teaspoon cumin
1/2 teaspoon lemon juice
1 Tablespoon water
3/4 cup shredded cheddar
1/2 avocado


1.) Combine all ingredients except for cheese and avocado in a food processor and blend.
2.) Place mixture onto 3 tortillas and top with avocado and cheese. Fold in half and grill on a skillet at medium high just until warmed and browned.

Wednesday, September 15, 2010

Peasant Bread- No Kneading Required!

This is an excellent bread that I make whenever I don't have time to make a bread that I have to knead.

Peasant Bread

2 1/4 teaspoons yeast
2 Tablespoons honey
1 teaspoon sea salt
2 cups warm water
2 cups unbleached flour
2 cups whole wheat flour
I often add oats, millet, or any other seeds I have around

Combine the yeast, honey, water, and salt and let set 10 minutes.

Add in the flours and stir until well mixed.

Place dough in a well greased bowl and cover with a towel. Let rise for 1 1/2 hours.

Shape into 2 loaves and place on a cookie sheet.

Cook 375 for 30 minutes

Tuesday, September 14, 2010

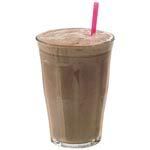
Chocolate Peanut Butter Banana Protein Shake

Shake it! Pictures, Images and Photos

After seeing Crystal's recipe for her chocolate peanut butter banana smoothie that she is drinking after her P90X workout I was inspired to try out her recipe with a few changes. It was so good that my husband asked if we could have it for breakfast every morning. I was a bit unsure if I would like banana and chocolate together, but I was pleasantly surprised.

Chocolate Peanut Butter Banana Protein Shake

1 cup chocolate almond milk
1 frozen banana
1/4 cup organic vanilla yogurt
1 tablespoon ground flaxseed
1 tablespoon natural peanut butter
A couple of ice cubes

Place everything in a blender and blend until smooth. This makes a yummy, healthy breakfast. Thanks Crystal!

Wednesday, July 14, 2010

Dinner Time At Our House

The deals have been a bit slow this week and my children have kept me very busy. My almost 5 month old has decided that napping is not much fun. I thought you might be interested in seeing a couple of meals that we have had in the last couple of weeks.

The above photo is a dinner I fixed for my family. We are trying to eat less meat and more produce. This meal consisted of homemade hummus, homemade cheese crackers, snap peas from in-laws garden, carrots, and cucumber slices. The protein in the hummus and cheese helps to keep us full longer. I really thought I would be starving a couple hours after eating this, but I was surprised when I was still happily full later. My kids really love it when I make the cheese crackers. Lately we have been having this meal about once a week. It is a good way to use up all the yummy homegrown veggies.
This pasta dish is one my husband made when we were in a hurry and did not have time to defrost and cook meat. He cooked some whole wheat pasta and added some fresh spinach and onion and then some frozen bell peppers. He spiced it up with some fresh chopped garlic, sea salt, and olive oil. I ended up adding some crushed red pepper to mine. The kids liked the pasta, but were not too excited about the veggies.

I am not going to lie and tell you that my kids love these meals and eat all their veggies. They often complain, but we keep serving them and try to be good examples. They do have to at least try a bite or two. I figure if they keep trying them they will eventually decide they are not that bad.

What meals have you and your family been eating lately? How are you using all the delicious fresh produce that is available right now?

Tuesday, June 22, 2010

Chocolate Avocado Pie

I am sure that you are thinking the same thing I was when I first saw the name of this recipe. "You have got to be kidding me. Who in their right mind would think of putting chocolate and avocados together?!" After reading the reviews and how everyone said it was really good I decided why not, I might as well give it a try.

The verdict: YUMMY!!

This pie was so good I let my kids have it with some fruit for lunch one day. From what I have read avocados have a neutral flavor that will compliment whatever they are added to. I ended up combining 2 different recipes so I could use what I already had on hand, and as usual I changed things around a bit.

Crust:

1 cup soaked walnuts, in water (30-45 min.)
1 cup almonds
5 pitted dates
1 Tablespoon maple syrup
2 Tablespoons organic, raw cacao powder
1 teaspoon cinnamon
1/4 teaspoon nutmeg
pinch sea salt

Filling:

2-3 ripe avocados
1/2 cup raw cacao
1/2 cup rapadura
1/4 teaspoon salt

Topping: (optional)

Strawberries
Oranges
Kiwi
Really any fruit you like

To make the crust place all crust ingredients in a food processor and blend until sticky.
Press mixture into a pie plate greased with coconut oil

To make the filling place all filling ingredients in food processor and blend until smooth
pour into prepared crust.

Chill 1-2 hours before serving.

Top with your choice of fruit.

This pie is very rich and tastes a bit like a chocolate cheesecake. It is also full of healthy, raw ingredients that are actually good for you.

I can't wait to try it out on some family members who think health food is supposed to taste bad.

Thursday, June 17, 2010

Natural Pink Icing

I made this cake for my daughter's birthday. I made it with the strawberry syrup I posted about awhile back. It turned out really well. Pink is her favorite color and I was happy to be able to make her something that did not have artificial food dye in it.

I also made the cake from scratch so I knew what was going into it. I ended up making a basic white cake that I googled a recipe for. I added some chopped strawberries to the batter as well. It ended up tasting like a sugar cookie with strawberries. YUM!

Here is the recipe for the icing...

Take 2 cups of fresh or frozen strawberries and add 1/4 cup sugar to a saucepan.
Bring to a boil and cook until the berries release their juice
Allow mixture to cool and then strain strawberries through a cheesecloth or towel.
You should be left with strawberry syrup
Add enough powdered sugar to syrup until you get the consistency you want
There you have it. Pink strawberry icing.


Thursday, June 3, 2010

Chocolate Fruit and Nut Balls/Bars


We are having a garage sale at my brother's house this morning and tomorrow so I will not be around much. Here is a recipe that I had ready to go. When I get a free minute I will add the pictures.

Last week I mentioned that we ate Earth Balls for breakfast. I decided that I would go ahead and post my variation on these. They are really yummy and rarely last longer then a day at my house. The original recipe is from the vegan blog Green and Crunchy. I don't always measure things when I am cooking so I can not give exact measurements. This recipe is really better if you just eye ball it. It is really a matter of preference anyway as to how sticky you want your balls.

Chocolate Fruit and Nut Balls (or bars)

1 cup almonds
1 cup walnuts (any combination of nuts will work)
1/4 - 1/3 cup peanut or almond butter
1 Tablespoon organic cocoa
1 Tablespoon chia seeds
1 Tablespoon flax seeds
1/4 cup sunflower seeds
4-5 pitted dates (enough to make the mixture sticky)
enough maple syrup to make the mixture stick together

Place the nuts in a food processor and blend until they create a fine meal.
Add seeds and nut butter and blend again
Add dates and maple syrup to food processor and blend until a dough starts to form.
Dump the mixture into a pan and form into bars or roll into balls
They are ready to eat.
We store our in the fridge so they harden a bit and are easier to handle.

The great thing about this recipe is you can be very creative and customize it to what you have on hand. Try adding different nuts and seeds or different fruits such as goji berries or other dried fruits.

We like to eat these for breakfast along with some fruit. They are very high in protein and nutrients that keep us full all morning.

Thursday, May 27, 2010

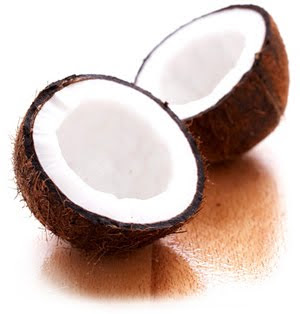
The Many Uses Of Coconut Oil


Since I wrote a post yesterday on homemade deodorant and I was wanting to write one on homemade sunscreen (coconut oil) I figured I might as well tell you about all the uses I know of so far for this versatile oil. Not only is it very healthy for you to use in recipes, but it also has many cosmetic uses.


Here is a list of what I have researched so far...

Deodorant-See my post on this here.

Hair gel- Just use it straight out of the jar. I have been told this works really well on curly hair. Someone will have to tell me if this really works since I have very straight hair.

Hair conditioner- Again use it straight out of the jar.

Acne cream- I had a reader suggest this one to me. I have to admit that even at nearly 30 I still have issues with pimples. I was told that this will help dry them out quickly. I was a bit skeptical since it is an oil. How could an oil dry something out? Well I tried and guess what? It really does work.

Sunscreen- Islanders have been using coconut oil for years as a natural sunscreen. This is one I plan to try this summer. I have a lot of issues with applying chemicals to my babies to protect them from sunburns. Even the organic and natural brands still make nervous. Hopefully this works.

Toothpaste- You can check out Lindsey's recipe for this here. I have not been brave enough to try it yet. I still have a couple tubes of Nature's Gate toothpaste that I bought using Swagbucks. Maybe I will have to try this one sometime.

Lotion- You can add shea butter to coconut oil to make a great lotion or just use it by itself. I have been using coconut oil on my 2 year to treat eczema. For a long time it was the only thing that did not make him scream.

Facial moisturizer- Apply just as you would any moisturizer.

Diaper rash cream- I found the original recipe for this at Passionate Homemaking. You can check out my post on it here.

Don't forget all the great ways this oil can be used in cooking. You can use it to replace butter when baking, in popcorn, as a spread on bread, and in oatmeal. While researching for this post I ran across this article on the benefits of coconut oil. It was quite interesting.

I know that there are tons of blogs right now that can show you how to buy all of the above listed products for cheap or even free, but at what cost to your body? I will admit that I have used coupons to get things for free, but after reading the ingredient list I decided to try and look for alternatives. The only problem was that organic and natural products are very expensive. I still buy them when I can find them on sale or I have coupons for the natural brands, but when I am unable to afford them coconut oil is a great alternative. It is cheap and good for you.

So where is the best place to find coconut oil? I have used spectrum brand in the past, but have lately been using Nutiva. Right now you can get 2 jars on Amazon for around $13. This is a great price.

It might be cheaper to buy it in bulk from Azure Standard or Mountain Rose Herb if you can find someone willing to split it with you.

I would caution you not to buy the cheap stuff you can buy at Walmart or other grocery stores. It is not the same and it contains additives.

Isn't it amazing how our Lord provides us with one product that can be used in so many ways and only cost us pennies per use?

Homemade Deodorant Update


Awhile back I wrote a post on making homemade deodorant. I thought it was time to do a little update on what I think of it. Hopefully you are not completely grossed out, but you might as well hear my whole review.

It has started to get hot here in Kansas and I have noticed that since having my third baby I am much stinkier then I used to be. In fact, I never really used deodorant. Gross I know, but I really think that after awhile the bodies pH adapts and not everyone needs it all the time.

Well I think my body is changing again and I need it. I seem to stink the most about an hour after I shower. Earlier this week I noticed the smell and decided to rewash my underarms (still stiny) and try some of the homemade deodorant that I had made for my husband. I could not believe it. The smell was gone almost as soon as I put it on! What was even better is it did not come back.

So I would have to say that this recipe is a winner. I originally found it on Passionate Homemaking and have been passing it around to friends ever since.


5-6 Tablespoons coconut oil
1/4 cup arrowroot flour (or cornstarch)
1/4 cup baking soda

Mix everything together in a bowl. You may have to warm the oil a bit to get everything to mix. It will become solid again as it cools. You can then either leave the mixture in a bowl and apply with your fingers or place it in an empty deodorant container and apply that way.

Monday, May 24, 2010

Fun Birthday Food Without Artificial Colors


I guess from the comments I received from my last post I will continue with this blog. I am aiming to update once or twice a week as suggested by a commentor. We will have to see where things go from there. I also was talking with one of the moms from my daughter's preschool and she was commenting on how expensive it is to eat healthy. She loved the idea of this blog and urged me to continue. I am planning to take it slow and not stress if I am not keeping up with my planned schedule.

All that said I ran across a really great idea from Martha Stewart for cupcake icing and ice cream syrup that is made with fruit and herbs. My daughters birthday is in a couple of weeks and I was cringing at the idea of making her a cake full of artificial colors. I now have green, purple, and pink colors ready to test out tonight to see what we think. I wish I had taken pictures of the process, but I did not decide to post about it until after I had it all made. I will try to get some pictures of the finished product and post them later.

Basically what I did was cook up some blueberries, strawberries, and some chocolate mint leaves and add them to a simple sugar solution. They are all really yummy. After straining them through a towel I now have 3 colors to make icing or pink, purple, or green "cows." (brown cow ice cream)

I would love to post the actual recipe, but since it is copyrighted I will just have to send you to the link to check it out for yourselves.

I could not locate the link to the icing, but basically all you do is add powdered sugar to the syrup until it is the consistency of honey. Dip the cupcake in it and you are done.

I am still searching for a good cake recipe. If anyone has one let me know.

Thursday, March 18, 2010

Naturally Maintaining Milk Supply While Sick

mother and baby Pictures, Images and Photos
This past week has been a bit challenging for me due to having a new baby as well as 2 children and myself fighting colds. I was having some trouble with milk supply anyone so being sick has really not helped. Add on top of that the added stress of a still very sick father and trying to figure out how to care for him and trying to get a house ready for sale. Needless to say I am a bit stressed right now. I asked my husband this morning what it is like to sleep more then 1-2 hours in a row. I know I should not complain because this is just a season and it will pass, but for now I am exhausted.

I decided to start looking into some ways to help increase my milk supply naturally and frugally. Here is what I came up with. Hopefully it works.

1.) Lactation cookies- I originally tried these when I was nursing my son 2 years ago. I seem to remember them working ok. Even if they don't work they are really yummy and filled with healthy ingredients. The recipe I linked to calls for a lot more sugar then I am willing to use. I will probably half it this time or use a natural sweetener such as honey. I may also try using coconut oil or applesauce instead of butter.

2.) Fenugreek- This has been used for years by women trying to increase milk supply. It is safe and not very expensive. I found mine at a local health food store.

3.) "Try" to nap

4.) Vitamin C to fight my cold. I have been taking my kids chewable immune defense vitamins from our healthy food store. As an added bonus they have whole food concentrates in them as well.

5.) Lots of water and a healthy diet- It is amazing how much more milk I have when I remember to drink water. A well balanced diet is very important for quality milk.

6) Nurse or pump more often.

Hopefully these things will work. I will keep you posted.

Thursday, December 10, 2009

Healthy, Yummy Holiday Cooking

This afternoon I decided the kids and I needed to try and get in the holiday spirit after the rough last couple of weeks we have had. I am not sure what I was thinking trying to cook with a 2 and 4 year old, but we ended up having fun and making some yummy food. The cookies are still baking and the fudge is setting up. When I have it all finished I will try and get some pictures.

Here are the recipes we used...

Orange Cream Cheese Sugar Cookies
Peanut Butter Honey Fudge
Chocolate Fudge

Everything turned out really yummy considering they used mostly organic and whole ingredients. We decided we liked the peanut butter fudge the best. The chocolate was good, but a little bit bitter. They do taste a little different since they call for honey instead of sugar, but they are much better for you.

Wednesday, December 9, 2009

Easy "Ice cream"

I did not manage to get a picture of this recipe, but there was not too much to show you. I read in Vegetarian Times yesterday that you can put a tub of yogurt into your ice cream maker and have frozen yogurt.

I decided to give this a try for breakfast this morning. Imagine my kids surprise when I told them we were having "ice cream" for breakfast. All I did was open a tub of vanilla yogurt and toss it into my ice cream maker. 20 minutes later we had fresh frozen yogurt. It was really good. The only problem was my kids decided it was a bit too cold today for ice cream (15 degrees outside).

You could easily top this with some fresh fruit, nuts, or granola and have a really healthy treat for breakfast or any time of the day.

Friday, November 20, 2009

Foodie Friday

Thank you for all the kind comments everyone has left concerning my dad. As of last night when I left the hospital he had not changed much. He is still in the ICU and unable to swallow or move his left side. He is talking and has a sense of humor. We will continue to pray for his quick recovery.

Here is a new recipe that my daughter and I tried this week for breakfast cookies. We made some substitutions to make it a bit healthier. I had issues with feeding my kids cookies for breakfast even if the title said "breakfast."

Breakfast Cookies

1 cup applesauce (originally butter)
1/2 cup honey (originally 3/4 c)
2 eggs
1 t salt
1 t cinnamon
1 t baking soda
1 t vanilla ( I was out)
1/2 buttermilk (I had to use whole milk and vinegar)
2 cups oats
2 c whole wheat flour
2 Tablespoons ground flax seed (Not in original recipe)
1 cup raisins, dried fruit, or chocolate chips (I used 1/2 cup mini chocolate chips)

Mix everything together and place heaping tablespoons onto a cookie sheet. Cook at 350 for 10-12 minutes.

The verdict- Not too bad. Definitely not a rich, chocolate cookie, but a great breakfast. My kids have really enjoyed them. I like the fact that they are packed with fiber, protein, and a little chocolate :)

I am having trouble getting Mr Linky to cooperate. Please feel free to leave a comment below with any recipes, food ideas, or any great finds you bought this week. Include a link for others if you have it posted on your blog.

Hopefully in the next couple of days I can get back to regular posting.